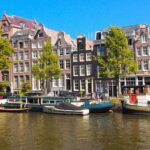

The best photo spots in Amsterdam are Damrak for the classic canal-house reflection, Staalmeestersbrug for a precise canal-and-tower composition, the Rijksmuseum for architecture, NDSM for large-scale street art, and NEMO for a free skyline view. Start around sunrise for quieter streets and calmer water. Save markets, museum interiors, and rooftop views for later in the day.
After making Amsterdam home, I kept returning to these locations in different seasons and weather. A familiar viewpoint can produce a completely different frame when the wind drops, a canal boat enters the scene, or blue hour begins. This guide focuses on where to stand, when to arrive, and which rules matter—not just a list of attractive place names.
Access details and confirmed event dates were last checked on August 14, 2026. Opening hours, terrace access, ferry routes, and photography policies can change, so recheck the linked official source before a time-sensitive visit.
Key Takeaways
- Best classic Amsterdam photograph: Damrak’s narrow canal houses shortly before or after sunrise.
- Best composed canal view: Staalmeestersbrug looking along the Groenburgwal toward the Zuiderkerk.
- Best architectural subject: The Rijksmuseum exterior, passage, and gardens.
- Best street-art location: NDSM Wharf and STRAAT Museum in Amsterdam-Noord.
- Best free skyline view: NEMO Science Museum’s Rooftop Square.
- Best neighborhood walk: Brouwersgracht, Noordermarkt, and Westerkerk in the Jordaan.
- Best quiet historical setting: Begijnhof, provided you respect its limited visitor area and residential character.
Contents
- Damrak and the Canal Belt
- Staalmeestersbrug and the Zuiderkerk View
- Rijksmuseum and Museumplein
- NDSM Wharf and STRAAT Museum
- Begijnhof
- De Pijp and Albert Cuyp Market
- Seasonal Amsterdam
- NEMO, A’DAM Lookout, and OBA
- Jordaan and Brouwersgracht
- Photography Etiquette and Access Rules
- Camera-Setting Starting Points
- Frequently Asked Questions
Amsterdam Photo Spots at a Glance
| Location | Signature photograph | Best light | Access note |
|---|---|---|---|
| Damrak and Canal Belt | Narrow houses reflected in the water | Sunrise or blue hour | Free public space; watch for bikes, boats, and pedestrians |
| Staalmeestersbrug | Groenburgwal leading toward Zuiderkerk | Sunrise or blue hour | Free public bridge; keep the route clear |
| Rijksmuseum | Symmetrical façade, passage, and gardens | Early morning or late afternoon | Gardens are free during opening hours; ticket required inside |
| NDSM and STRAAT | Murals, cranes, industrial buildings, and the IJ | Overcast light or late afternoon | Outdoor site is free; professional shoots require permission |
| Begijnhof | Residential courtyard and historic façades | Soft late-morning light or overcast weather | Open 10:00–18:00; private property with a limited visitor area |
| De Pijp | Market activity, street details, and neighborhood scenes | Morning market hours or late afternoon | Albert Cuyp Market operates Monday–Saturday |
| Seasonal Amsterdam | Tulips, orange crowds, canal parades, and light art | Depends on the event | Dates, routes, and crowd controls change annually |
| Rooftop viewpoints | Centraal Station, old city, IJ, and harbor | Clear sunset through blue hour | NEMO is free; A’DAM is paid; OBA terrace access can vary |
| Jordaan | Canal curves, markets, gables, and Westerkerk | Early morning or golden hour | Free public streets; busiest around market periods |
A Practical One-Day Amsterdam Photography Route
You can cover six central locations in one long day without rushing every frame. NDSM and the rooftop viewpoints work better as a separate afternoon or evening session. Review our guide to getting around Amsterdam before choosing between walking, trams, and ferries.
- Start at Damrak before sunrise. Photograph the narrow houses while the water is more likely to be calm and tour-boat activity is limited.
- Walk to Staalmeestersbrug. Use the Groenburgwal and Zuiderkerk as a precise leading-line composition.
- Visit Begijnhof after it opens at 10:00. Keep the session brief and quiet.
- Continue to the Rijksmuseum. Work the exterior, passage, and gardens before considering interior photography.
- Photograph De Pijp around lunch. Market activity gives you movement, food, signs, and environmental portraits.
- Finish in the Jordaan. Brouwersgracht and Westerkerk work well as the late-afternoon light begins to angle across the canals.
1. Damrak and the Canal Belt
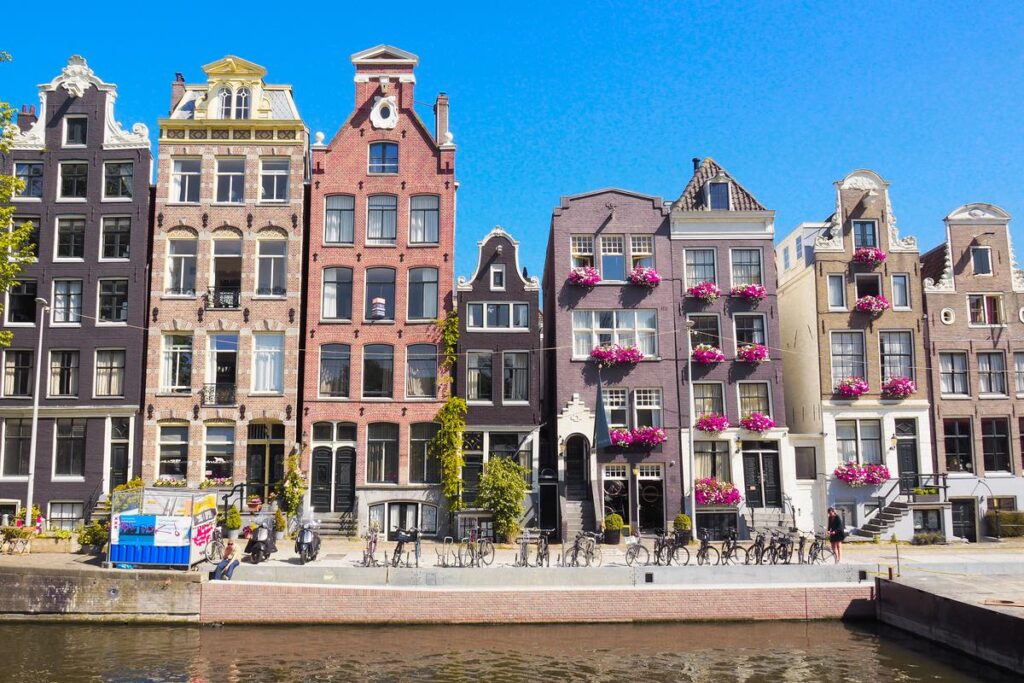
Amsterdam’s Canal Ring is not simply a decorative backdrop. The concentric network of waterways, gabled houses, bridges, and historic plots is a UNESCO World Heritage Site shaped by large-scale hydraulic engineering and urban planning. For photography, that ordered structure gives you repeated façades, converging lines, reflections, and layered bridges.
The Exact Damrak Composition
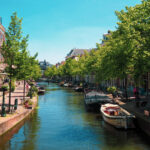
At Damrak, stand on the pavement opposite the narrow houses that rise directly from the water. Place the façades in the upper half of the frame and leave enough water below them to capture a full reflection. A windless sunrise gives you the cleanest surface, while blue hour adds window lights and deeper color to the sky.
- Lens: Start around 24–35mm on a full-frame camera. Use a longer focal length to isolate leaning façades and roof details.
- Exposure: Protect the bright sky and lift the darker buildings during editing rather than clipping highlights.
- Reflection: A polarizing filter can reduce glare, but rotating it too far may remove the reflection you came to photograph.
- Vertical frames: Damrak’s tall, narrow houses also work well for phone photography and vertical social formats.
Other Canal Views Worth the Walk
From the odd-numbered side of the Reguliersgracht and Herengracht intersection, Amsterdam’s official bridge guide identifies a line of sight across 15 bridges. The better-known seven-bridge sequence appears along Reguliersgracht, where repeated arches become especially clear after their lights switch on.
- Prinsengracht: Use church towers, canal bends, and moored boats to create layers rather than photographing a flat row of façades.
- Herengracht: Look for broad sections of water and formal canal houses.
- Keizersgracht: Photograph repeating bridges at blue hour or compress them with a telephoto lens.
- Reguliersgracht: Use the brick arches as a repeated pattern, especially when the canal lights are visible.
- Amstel: Include the Magere Brug or passing boats to give the wider river scale.
Our guide to Amsterdam’s canals covers the waterways in more detail. A canal cruise also gives you a lower viewpoint beneath bridge arches, although reflections and compositions change quickly from a moving boat.
2. Staalmeestersbrug and the Zuiderkerk View
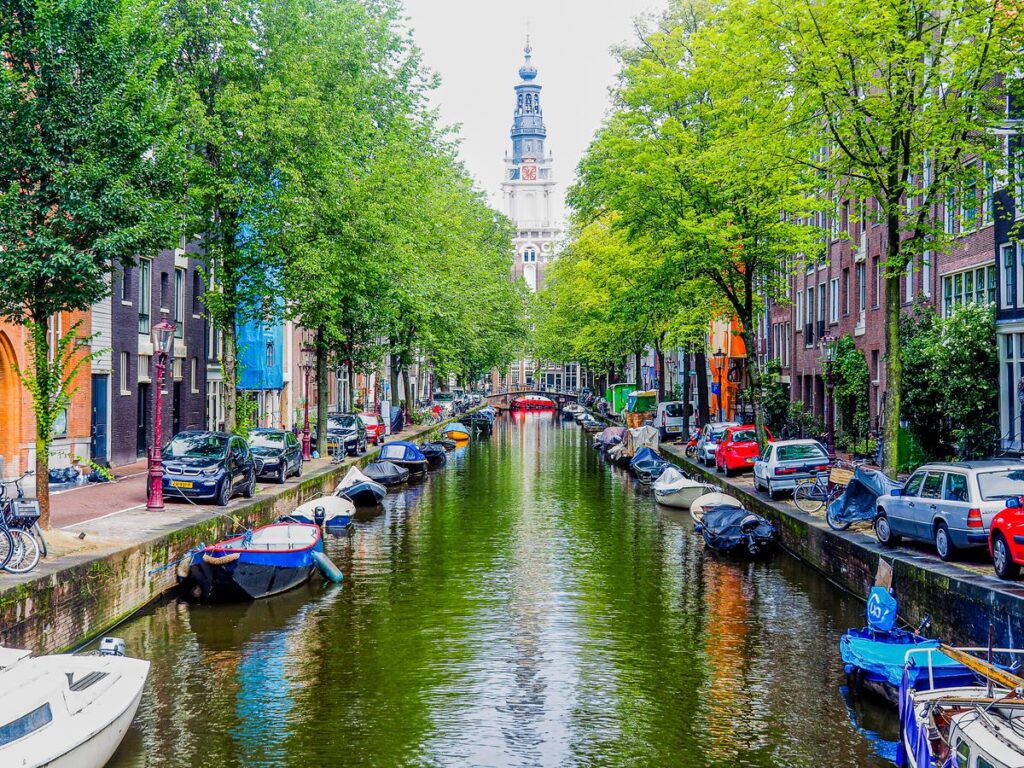
Staalmeestersbrug provides one of Amsterdam’s most deliberate-looking compositions. From the bridge, the Groenburgwal creates a straight visual path between canal houses toward the Zuiderkerk tower. Unlike a broad canal panorama, the subject is already organized into foreground, middle distance, and a clear architectural endpoint.
How to Frame the View
- Use a level camera so the tower and canal houses do not lean more than they naturally do.
- Place the Zuiderkerk near the center for symmetry or slightly off-center when boats and reflections balance the opposite side.
- Try both a wide frame that includes the canal edges and a tighter 50–85mm frame that enlarges the tower.
- At blue hour, expose for the tower and lamps while retaining color in the sky.
Sunrise usually gives you the least interrupted composition. Later in the day, work from the side of the bridge and step away whenever pedestrians or cyclists approach. Do not add a love lock: the city regularly removes locks from this bridge. For more alternatives, see our guide to the best bridges in Amsterdam.
3. Rijksmuseum and Museumplein

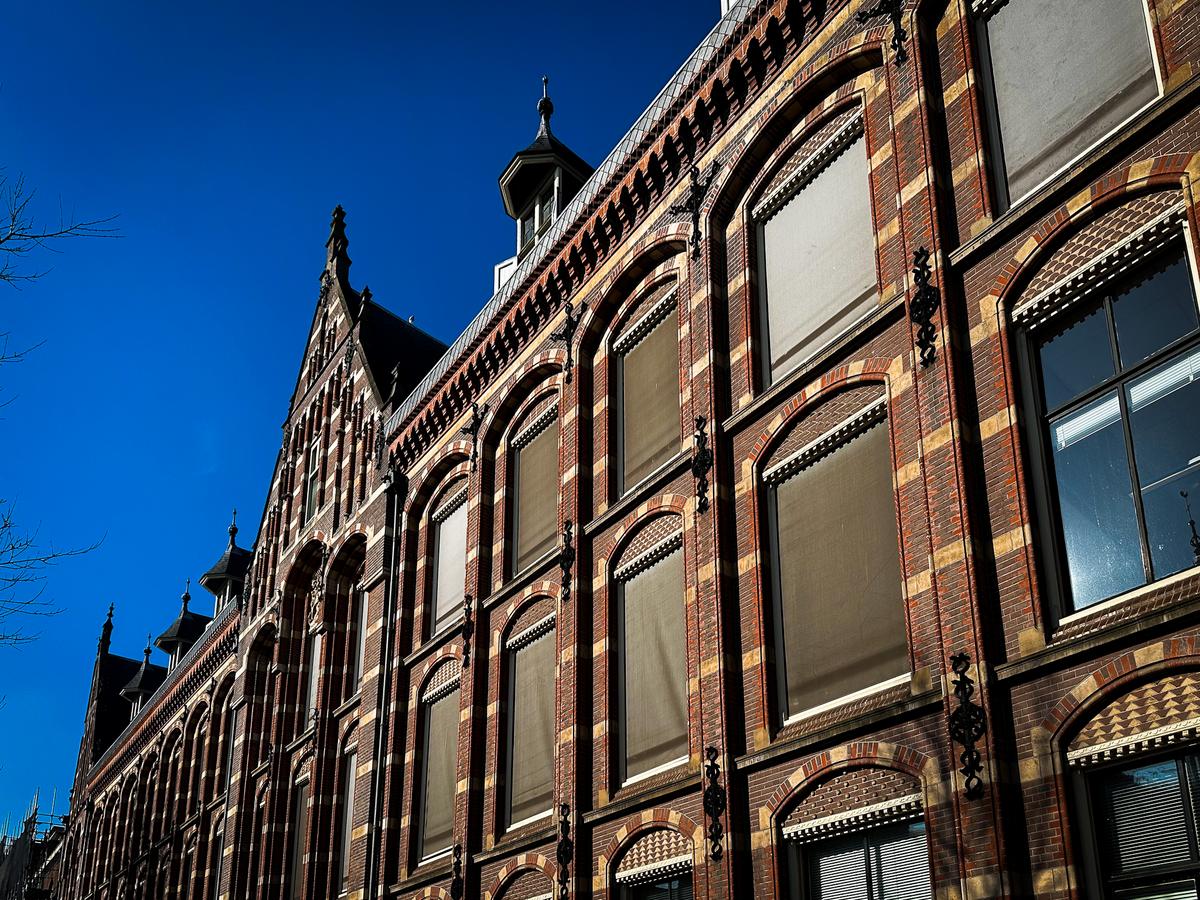
The Rijksmuseum is the strongest architectural subject on this list. Pierre Cuypers’ façade offers towers, arches, masonry details, and near symmetry, while the passage beneath the building supplies leading lines and framed silhouettes.
Do not plan your composition around permanent I amsterdam letters. The Museumplein installation was removed in December 2018 because it attracted excessive crowds. Other sets travel or appear elsewhere, but they are no longer a dependable foreground at the museum.
Best Rijksmuseum Compositions
- Full façade: Use a wide-angle lens from Museumplein and keep the vertical lines controlled.
- Passage: Use the arch as a frame and wait for a cyclist or pedestrian to enter the brighter opening.
- Architectural details: A telephoto lens isolates sculptures, rooflines, clocks, and stonework.
- Gardens: Use flowers, hedges, sculpture, or branches as a foreground rather than repeating the standard frontal view.

Photography Rules
The Rijksmuseum permits visitors to take photographs when they do not inconvenience others. A valid ticket is required inside, and tripods and additional lighting are not allowed. Its gardens are free to enter during museum opening hours, currently daily from 09:00 to 17:00. Review the museum’s current photography policy before planning a staged or professional shoot.
4. NDSM Wharf and STRAAT Museum

NDSM Wharf trades the Canal Belt’s formal façades for shipyard structures, exposed steel, murals, warehouses, cranes, and open views across the IJ. The contrast makes it the best location in this guide for industrial and large-scale street-art photography.
Take the signed NDSM ferry from behind Amsterdam Centraal. Amsterdam’s ferries across the IJ are free for pedestrians and cyclists, and the crossing itself can provide photographs of the station, harbor traffic, and the changing waterfront.
What to Photograph
- STRAAT Museum: Use people to show the scale of the monumental murals rather than filling every frame with a flat wall.
- Shipyard structures: Look for repeated steel beams, weathered surfaces, cranes, and geometric shadows.
- IJ waterfront: Photograph ferries and boats against the lower skyline across the river.
- Murals outdoors: Overcast weather often gives you more even color than direct midday sun.
Personal and Commercial Photography Rules
The outdoor NDSM site is free and open throughout the year. Its current policy permits personal photography and a small-scale shoot of no more than three people, but artwork cannot be used commercially without permission. Professional or commercial activity requires advance approval from the site.
Inside STRAAT, personal photographs and videos are allowed. Professional photography or filming requires written permission requested at least three days in advance. Check the official NDSM photography rules and STRAAT FAQ before bringing models, lights, assistants, or commercial equipment.
5. Begijnhof

The Begijnhof offers a quieter architectural study than the Canal Belt, but it should not be described as an untouched medieval courtyard. Its first recorded mention dates to 1307, while most façades were replaced during the 17th and 18th centuries. The wooden Houten Huys at number 34 retains much older material.
Access and Etiquette
The courtyard is currently open daily from 10:00 to 18:00 and is closed to tourists on King’s Day. Enter from Gedempte Begijnensloot. It is private residential property, and visitors may enter only the designated portion of the courtyard.
- Use a quiet handheld setup rather than treating the courtyard as a portrait studio.
- Do not photograph through residential windows or doorways.
- Keep voices low and follow instructions from the courtyard hosts.
- Bikes, dogs, trolley cases, food, and drinks are not permitted inside.
Soft overcast light suits the courtyard because it controls contrast between the sky and darker façades. Try a vertical frame through the entrance, a wider courtyard view, and a detail study of doors, gables, or the wooden house. Review the official visitor information before going.
6. De Pijp and Albert Cuyp Market

De Pijp is more useful for street life than for monumental architecture. Its strongest subjects are Albert Cuyp Market, café façades, parked bicycles, shop signs, food preparation, narrow residential streets, and the greenery of Sarphatipark.
Photographing Albert Cuyp Market
Albert Cuyp Market currently operates Monday through Saturday from 09:30 to 17:00 and is closed on Sunday. Early in the morning, stalls are being prepared and the street is easier to frame. Later, the denser flow of shoppers creates more energetic photographs but requires faster reactions.
- Use 1/250 second or faster for vendors, shoppers, and hand gestures.
- Photograph layered scenes through produce, flowers, signs, or hanging goods.
- Ask before making a close portrait of a vendor or identifiable shopper.
- Do not stop in the central flow of the market to arrange a prolonged pose.
- Switch to a 35mm or 50mm lens when a wide-angle frame makes people at the edges look distorted.
After the market, use Sarphatipark for quieter scenes, tree-framed views, reflections after rain, and environmental portraits. De Pijp rewards observation more than a single predetermined viewpoint.
7. Seasonal Amsterdam: Tulips, King’s Day, Pride, and Light Festival

Amsterdam’s seasonal events change the subjects, access conditions, and pace of photography. They also require more planning than an ordinary canal walk because dates, routes, barriers, and crowd rules can change each year.
| Event | Next confirmed timing | Best photographic approach |
|---|---|---|
| Amsterdam Light Festival | November 26, 2026–January 17, 2027 | Begin at twilight so the sky retains color while installations and canal lights become visible |
| Keukenhof | March 18–May 9, 2027 | Arrive near opening time for lower crowds and softer light; remember that Keukenhof is in Lisse, not Amsterdam |
| King’s Day | April 27, 2027 | Use a fast shutter for movement, orange clothing, boats, street markets, and family scenes |
| Pride Amsterdam | Future dates should be checked on the official calendar | Research the parade route, find a safe position early, and ask before making close portraits |
Tulips in and Beyond Amsterdam
Tulip displays around Museumplein and other city locations give you repeated color and clean graphic patterns. For the large spring gardens, plan a separate trip to Keukenhof Gardens in Lisse. The park’s confirmed 2027 season runs from March 18 through May 9.
King’s Day

King’s Day in Amsterdam is visually dense, but the city center becomes difficult to navigate and public transport routes change. Work with a small kit, protect your equipment, and favor short candid sequences over elaborate setups. Photograph children and close portraits only with appropriate consent.
Pride Amsterdam
Pride offers street celebrations, portraits, flags, boats, and reflections along the parade route. Treat it as both a celebration and a community event—not merely a colorful backdrop. Avoid obstructing the route, respect anyone who declines a photograph, and do not assume that attendance equals consent for a close portrait. Check the official Pride Amsterdam calendar for the next confirmed dates and route.
Amsterdam Light Festival
For the Amsterdam Light Festival, begin before full darkness. A deep-blue sky usually gives the light installations more context than a completely black background. Stabilize the camera only where a tripod will not obstruct a bridge or pavement, and expose several variations because moving boats can create either useful light trails or unwanted interruptions.
8. Rooftop Views: NEMO, A’DAM Lookout, and OBA

Amsterdam’s low, relatively even skyline means a modest amount of elevation changes the scene significantly. Rooftops reveal how Centraal Station, the IJ, church towers, harbor structures, and the Canal Belt fit together.
NEMO Science Museum: Best Free Skyline View
The Rooftop Square at NEMO Science Museum is the best free elevated option in this guide. It is currently open daily from 10:00 to 17:30, with summer Thursday hours extending to 21:00. Access is free via the stairs on the east side.
Use the roof for views over Oosterdok, the old center, rail infrastructure, and nearby waterfront architecture. Midday can produce hard contrast, so a clear late afternoon or summer Thursday evening is preferable. Confirm the current schedule on NEMO’s Rooftop Square page.
A’DAM Lookout: Best Paid Panorama
A’DAM Lookout provides indoor and outdoor 360-degree views from Amsterdam-Noord. It currently operates from 10:00 to 22:00, with last entry at 21:00. Its optional Over the Edge swing extends from the tower at a height of 100 meters; it should be described as Amsterdam’s highest swing rather than Europe’s highest.
Arrive before sunset so you can photograph the city in daylight, sunset, and early blue hour during one visit. A 35–85mm focal range is more useful than an extreme wide angle when you want to isolate Centraal Station, church towers, ferries, and individual districts.
Affiliate disclosure: ViaTravelers may earn a commission if you book through the following link, at no additional cost to you.
OBA Oosterdok: Library and Terrace Views
OBA Oosterdok’s upper floor and restaurant terrace provide a budget-friendly view over the city near Centraal Station. The indoor windows are also useful when weather closes the terrace or reflections can be controlled. Terrace availability and restaurant access can vary, so check the OBA Oosterdok location page shortly before visiting.
9. Jordaan and Brouwersgracht

The Jordaan does not depend on one famous frame. Its value comes from a compact sequence of canal bends, gabled houses, narrow side streets, market activity, houseboats, small bridges, and recurring views of the Westerkerk tower.
A Strong Jordaan Photo Walk
- Begin at Brouwersgracht. Use the canal bend to layer bridges, warehouses, boats, and façades.
- Continue toward Prinsengracht. Look for views where Westerkerk rises above the lower residential blocks.
- Work around Noordermarkt. The market currently operates Monday from 09:00 to 14:00 and Saturday from 09:00 to 16:00.
- Finish on the quieter residential streets. Use doors, stoops, bicycles, plants, and window details as smaller visual studies.
A 35mm or 50mm lens suits the Jordaan because it preserves context without exaggerating the nearest buildings. At sunrise, the streets are quieter. Later, market stalls and café activity add people and movement. Avoid photographing directly into homes, and do not use the visitor queue at the nearby Anne Frank House as a casual portrait backdrop.
Photography Etiquette and Access Rules
- Stay out of cycle lanes. A quiet-looking red lane can become busy within seconds.
- Keep bridges and pavements open. Do not place a tripod, bag, model, or group across the primary route.
- Respect residential privacy. Canal houses and Begijnhof buildings are homes, not sets.
- Ask for close portraits. A wide public scene and an identifiable close-up are not ethically equivalent.
- Check commercial-use rules. A personal travel photograph may be allowed where a branded shoot, stock image, advertisement, or large crew requires permission.
- Follow venue-specific equipment rules. The Rijksmuseum prohibits tripods and additional lighting, while NDSM and STRAAT impose separate professional-shoot requirements.
- Do not attach locks or props to bridges. Leave the structure as you found it.
- Check drone restrictions before every flight. Do not assume an urban launch is legal. Consult the Dutch government’s current drone guidance and official airspace map.
Camera-Setting Starting Points
These settings are starting points rather than fixed recipes. Adjust for focal length, stabilization, subject movement, wind, and the amount of depth you need.
| Scene | Shutter speed | Aperture | ISO | Practical note |
|---|---|---|---|---|
| Canal at sunrise, handheld | 1/125 second or faster | f/5.6–f/8 | Auto ISO with a sensible ceiling | Increase shutter speed when boats or people enter the frame |
| Blue-hour canal on a permitted tripod | 1–10 seconds | f/8 | ISO 100 | Make several exposures because boat movement changes the reflection |
| Market or street scene | 1/250–1/500 second | f/4–f/5.6 | Auto ISO | Prioritize gesture and subject movement over perfectly low ISO |
| Architecture | As required | f/7.1–f/11 | Lowest practical ISO | Keep the camera level and correct perspective cautiously |
| Murals | 1/125 second or faster | f/5.6–f/8 | Low to moderate | Diffuse light controls glare and uneven color |
| Rooftop sunset | 1/125 second or faster handheld | f/5.6–f/8 | Auto or low ISO | Bracket exposures when the sky is much brighter than the city |
Frequently Asked Questions
What is the best photo spot in Amsterdam?
Damrak is the easiest place to create the classic Amsterdam canal-house reflection. Staalmeestersbrug is the better choice for a carefully aligned composition because the Groenburgwal leads directly toward the Zuiderkerk tower.
Where should I take photos at sunrise in Amsterdam?
Start at Damrak, continue to Staalmeestersbrug, and then walk toward the quieter canals of the Jordaan. Sunrise usually gives you fewer pedestrians, less boat traffic, softer light, and a better chance of calm water.
Where can I get a free skyline view of Amsterdam?
NEMO Science Museum’s Rooftop Square is the strongest free elevated viewpoint in this guide. Access is currently free via the east-side stairs, and the roof is normally open daily from 10:00 to 17:30, with later Thursday hours during summer.
Can I use a tripod in Amsterdam?
A small tripod may be used in some public places when it does not obstruct pedestrians or cyclists, but individual venues set their own rules. The Rijksmuseum prohibits tripods inside, and crowded bridges are often unsuitable even when no sign expressly bans them.
Can I fly a drone for photos in Amsterdam?
Do not assume that an urban drone flight is legal. Restrictions depend on the aircraft, operator, location, airspace, and purpose. Check the Dutch government’s current rules and official airspace map before every proposed flight.
Can visitors take photos inside the Rijksmuseum?
Yes. Visitors may take photographs when they do not inconvenience other visitors. A valid ticket is required, and tripods and additional lighting are prohibited. Recheck the museum’s policy before a staged or professional shoot.
Plan for Light, Not Just Locations
You do not need to photograph all nine locations to come home with a strong Amsterdam set. Choose three subjects that differ from one another: a canal reflection, an architectural frame, and either a neighborhood or skyline view. Give each location enough time for the composition to change instead of collecting rushed versions of every landmark.
For broader planning, compare these famous Amsterdam landmarks and my reasons to visit Amsterdam. Photographers who need an affordable base near early-morning locations can also review the best hostels in Amsterdam.